
Choose between five- and six-rail livestock panels by comparing the actual clear openings and installed dimensions for your cattle. Six rails do not automatically mean a taller, stronger or safer panel. Request both drawings on the same dimensional basis, then evaluate the openings, bottom clearance and complete installed system.
What does the rail count actually tell you?
Rail count describes the number of horizontal members, but leaves most purchasing questions unanswered. It does not identify the panel height, the tube profile, the spacing pattern or the connection arrangement. Two suppliers can both quote a six-rail panel while offering substantially different openings and overall dimensions.
Start by agreeing how rails are counted. Ask whether the top and bottom horizontal members are included and whether the drawing matches the model name. Do not count shadows or overlapping panels in a catalog image. A front elevation with clearly identified members is a better comparison document.
A five-rail design can remain a valid candidate when its dimensions and intended use match the project. A six-rail design deserves consideration when its particular spacing pattern addresses a requirement the five-rail option does not. Neither label, by itself, establishes suitability for calves, horned cattle or demanding handling locations.
The useful question is therefore not which number wins. It is which documented arrangement fits the animals and working area you have described.
How should you compare the two product drawings?
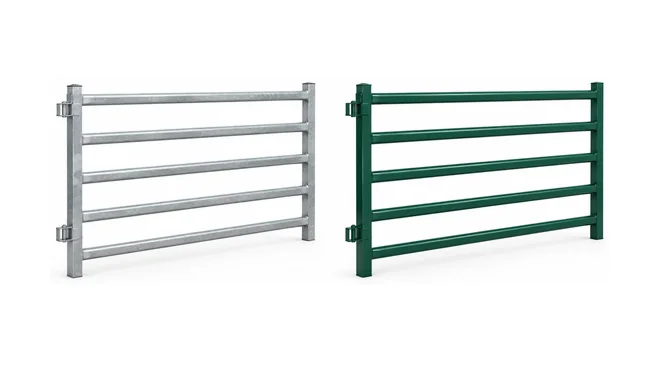
Request a front elevation for each option with the same measurement conventions. Compare overall height, horizontal member size, clear openings and the position of the bottom rail. If one drawing measures height from the ground and another from the bottom of the frame, first reconcile that difference.
| Drawing item | Question for the supplier |
|---|---|
| Overall height | Does this include projecting feet or posts? |
| Rail dimensions | What is the vertical depth of each member? |
| Clear gaps | Are all openings equal or intentionally varied? |
| Bottom clearance | What gap remains after installation? |
| End connections | What opening exists between adjacent frames? |
Use the HRC five-rail panel page as a starting point for requesting a configuration. Its reference dimensions are planning examples, not confirmation of the specification for your order.
Why can six rails still leave a larger opening?
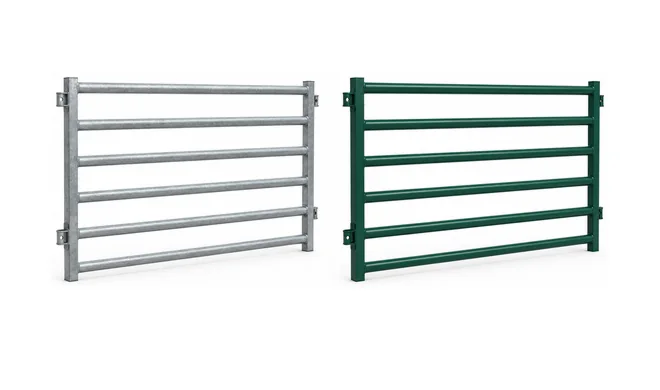
With the same distance between the top and bottom members and identical rail sizes, adding an intermediate rail distributes the available opening across more gaps. However, real quotations often change several variables together. A taller six-rail panel may have larger clear gaps than a shorter five-rail model.
Consider an illustrative calculation, not a product recommendation. If the clear vertical space between the inward faces of the top and bottom rails is 1,000 mm, three intermediate rails of 50 mm vertical depth leave 850 mm across four gaps: 212.5 mm per equal gap. Four intermediate rails leave 800 mm across five gaps: 160 mm each. These figures apply only to the stated hypothetical geometry.
Raise the frame height, change the rail depth or use unequal spacing, and those results change. Ask the supplier to show every gap instead of using an average as an acceptance criterion. Compare the six-rail configuration against the same project drawing, rather than assuming its catalog description settles the comparison.
How do you distinguish clear spacing from center spacing?
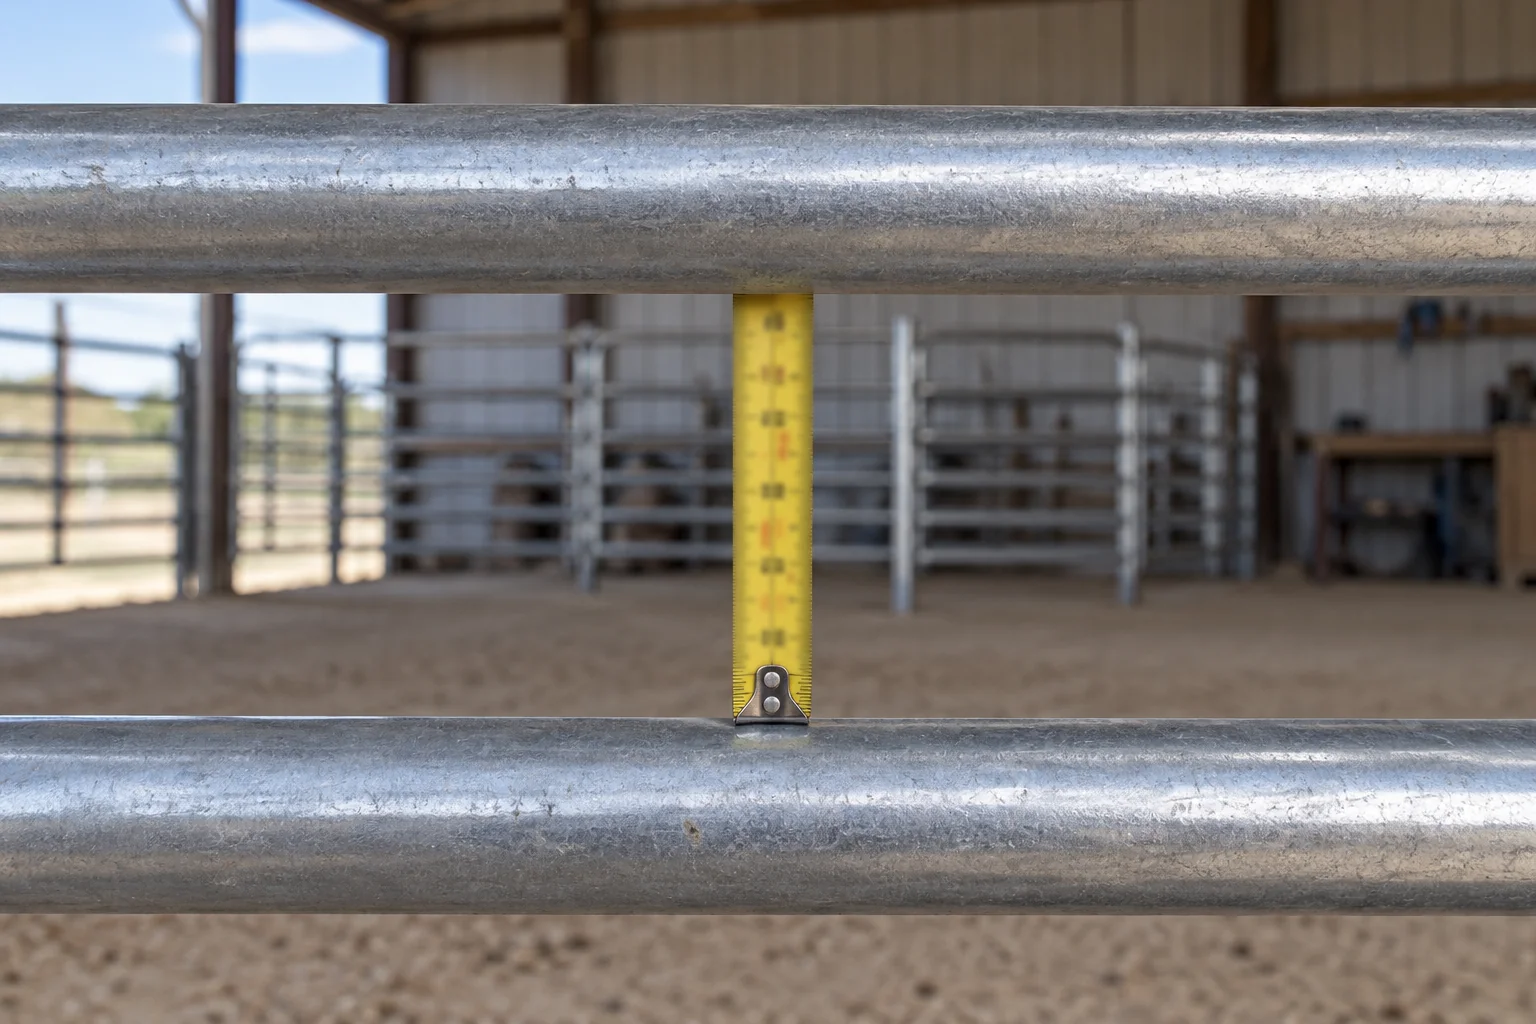
Clear spacing is the unobstructed distance between facing surfaces. Center spacing measures between member centerlines. Confusing them can produce an opening larger than the buyer expected, especially with substantial round, oval or rectangular members.
For identical horizontal members, clear spacing equals center spacing minus the member’s vertical depth. Use the actual installed orientation: an oval or rectangular tube has a different vertical depth when rotated. Where neighboring members differ in size, subtract half the vertical depth of each from the center distance.
- Mark the two facing surfaces on the drawing.
- Write the required clear opening rather than just a center dimension.
- Confirm fabrication tolerances and the measurement method.
- Check the finished sample at more than one position.
Do not use a catalog photograph as a ruler. Perspective, image resizing and hidden surfaces make it unsuitable for dimensional acceptance. Measurements should relate to the approved physical design and the inspection method agreed with the supplier.
Which cattle and locations must the comparison cover?
Describe the smallest and largest cattle expected to use the enclosure, not only the average adult animal. Include whether calves accompany cows, whether animals are horned, and whether groups change seasonally. This information allows a competent designer to assess openings and potential entrapment points in context.
Also distinguish a quiet holding boundary from a working race or a location where cattle bunch. A rail-count comparison is not a substitute for selecting equipment for the operating task. The UK HSE livestock guidance emphasizes suitable handling facilities and warns against makeshift equipment; it does not provide a universal five-rail or six-rail purchasing rule.
Ask the supplier to identify applications excluded from the proposed design. If a panel needs an infill or a different lower-rail arrangement, obtain an approved design rather than attaching improvised material. Changes can affect connections, loads and access. Review the actual configuration with someone familiar with your herd before approving quantities.
What changes when the panel is installed on your ground?
The manufactured frame is only one part of the opening pattern. Ground clearance can increase over hollows, and adjoining panels can form irregular gaps where their levels differ. A flat-floor sample therefore cannot prove that the same arrangement will work on a sloping pasture edge.
Provide a simple site profile or measured level changes along the proposed run. Ask how the system accommodates those changes without forcing connectors, leaving unintended openings or altering the gate position. Pay particular attention to the junction between a fixed post and a removable panel.
Keep bottom clearance separate from the gaps between rails in the comparison sheet. Likewise, record the opening at the end post and the gate edge separately. These are easy to overlook when a quotation lists only overall dimensions and rail count.
Where site conditions differ between locations, consider whether one standard configuration genuinely serves all locations. A single purchase line is convenient, but it should not hide different installation requirements.
Does an extra rail justify a higher price?
First ask what else changed in the quotation. The two offers may use different steel sections, wall thicknesses, lengths, finishes or hardware. Unless those details are visible, the price difference cannot be attributed to the extra rail.
Prepare a comparison with three columns: requirement, five-rail offer and six-rail offer. Mark each requirement as confirmed, exception or unanswered. Resolve missing information before selecting the lowest price. Include finished weight and handling arrangements if panels will be moved regularly, but do not treat weight as a stand-alone strength rating.
A useful purchasing decision can be expressed in one sentence: we selected this configuration because its documented openings and installation details meet these stated requirements. If the only explanation is that six sounds stronger, the technical comparison is not finished.
For multiple paddocks, label each location and its approved configuration. This reduces the chance that an installer substitutes a visually similar panel with different openings.
What if two quotations use the same rail count but different openings?
Keep both candidates in the comparison until you understand the reason for the difference. Ask each supplier to mark the largest clear opening, the lowest opening and the end connection gap on its drawing. Do not let an average spacing conceal one unusually large opening.
If your requirement is not yet defined, avoid choosing a dimension by copying a competitor’s catalog. Take the cattle description and site information to the person reviewing your facility, then return the agreed requirements to both suppliers. This creates a common basis for a decision.
When an offer changes, update the comparison sheet rather than comparing its revised price against the other supplier’s original specification. A small revision to height or rail profile can change the very opening pattern you were evaluating.
What should you send with your final configuration request?
Send a short, specific brief rather than asking for the supplier’s best panel. Include:
- The cattle groups and intended function of each enclosure.
- Overall dimensional limits and any measured ground variation.
- Required clear-gap information, including bottom and end openings.
- Existing connector details and gate interfaces.
- The drawing revision to be used for sample approval.
Ask for unresolved points to be highlighted, not silently assumed. Before ordering, compare the sample and final drawing using the same definitions that drove the selection. Keep the accepted gap schedule with the purchase record so a later repeat order does not depend on memory.
To discuss either arrangement, send HRC your herd description and dimensional brief. The goal is a confirmed configuration for your application, not simply a higher rail count.